How to Add a Newsletter Modal to Your Next.js App
A newsletter is a great way to engage with your audience, drive traffic to your website, and build lasting relationships by providing valuable content and is sent directly to their email inboxes. This is part of email marketing and is a cost effective way to market to your users. Sending emails is quick and easy with the benefits of increasing engagement and retention. In this blog post it will be about how to add a newsletter modal to your Next.js app.

Jordan Wu
8 min·Posted

Table of Contents
Why Do You Need a Newsletter?
Adding a newsletter to your website can bring numerous benefits, enhancing your marketing efforts and fostering stronger relationships with your audience. Here are key reasons why you should consider implementing a newsletter:
Direct Communication with Your Audience
Engagement: Newsletters provide a direct line of communication with your audience, enabling you to keep them informed about your latest content, products, and updates.
Personalization: Tailor your messages to different segments of your audience for a more personalized experience, which can increase engagement and loyalty.
Drive Traffic to Your Website
Regular Visits: By sending regular updates, you remind subscribers to visit your website, driving consistent traffic and increasing the chances of conversions.
Content Promotion: Promote new blog posts, products, or services directly to your subscribers, ensuring that your latest content reaches your most interested audience.
Build and Strengthen Relationships
Trust: Regular communication helps build trust and establish your brand as a reliable source of information.
Loyalty: By providing valuable content, exclusive offers, and insights, you can foster a loyal community of followers who are more likely to become repeat customers.
Boost Sales and Conversions
Targeted Marketing: Use newsletters to highlight special offers, discounts, and promotions, driving sales and increasing revenue.
Product Launches: Announce new products or services to your subscribers first, creating excitement and anticipation among your most engaged audience.
Gather Insights and Feedback
Analytics: Track open rates, click-through rates, and other metrics to gain insights into what resonates with your audience, helping you refine your content and marketing strategies.
Feedback: Encourage subscribers to share their opinions and feedback, providing valuable insights into customer preferences and areas for improvement.
Cost-Effective Marketing
Low Cost: Compared to other marketing channels, email newsletters are cost-effective, providing a high return on investment.
Scalability: Easily scalable to grow with your audience, allowing you to reach more people without significant additional costs.
Enhance Brand Awareness
Consistency: Regular newsletters keep your brand at the forefront of your audience's mind, increasing brand recall and awareness.
Voice and Personality: Showcase your brand's voice and personality, helping to differentiate your business from competitors.
Stay Top-of-Mind
Regular Reminders: Regularly appearing in your subscribers' inboxes keeps your brand top-of-mind, ensuring that when they need a product or service you offer, you are the first they consider.
Build a Community
Exclusive Content: Provide your subscribers with exclusive content and updates, making them feel part of a special community.
Interaction: Encourage interactions through comments, feedback, and community-driven content, fostering a sense of belonging among your audience.
How to Add a Newsletter Modal to Next.js App Router
This newsletter modal is based on previous blogs. First you would need to have a GraphQL endpoint to save the user's email to a database. You can check out How to Add GraphQL to Your Next.js App. Next you would need to have an Apollo Client and create a form component to save the user's email. You can check out How to Add Apollo Client to Your Next.js App.
This solution is based on GraphQL and Apollo Client from the previous blogs and could be modified to your use case. When creating a newsletter modal you can use React Portal. It's a perfect use case because they are overlaid on top of the main content. Using portal allows the modal to be rendered outside the main DOM tree, avoiding potential styling and positioning issues.
Requirements
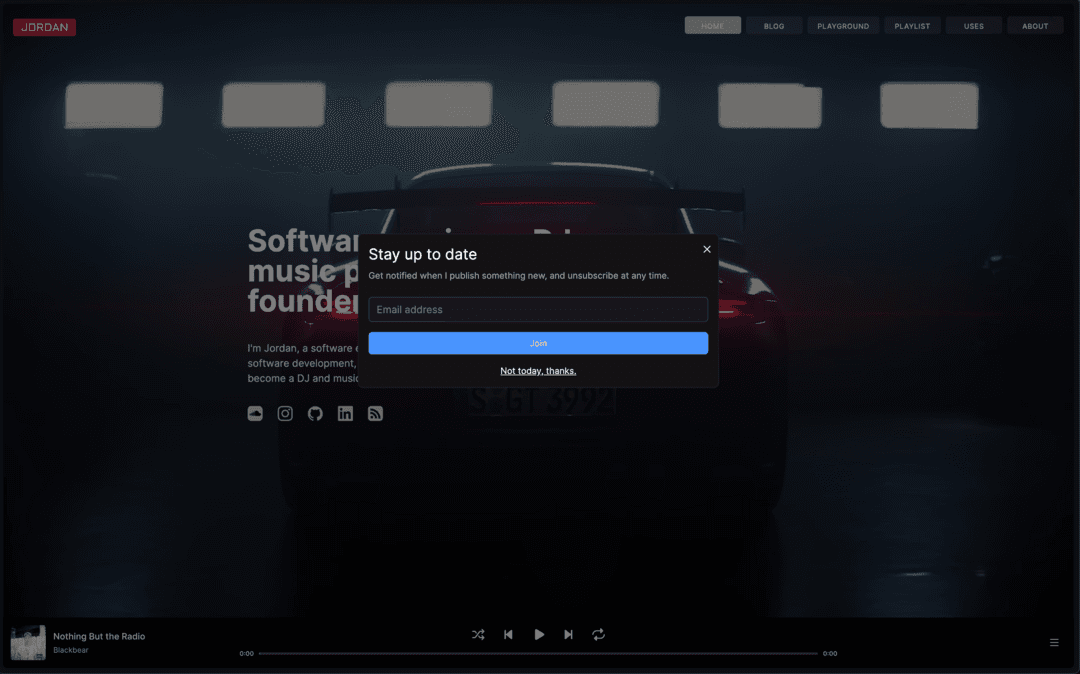
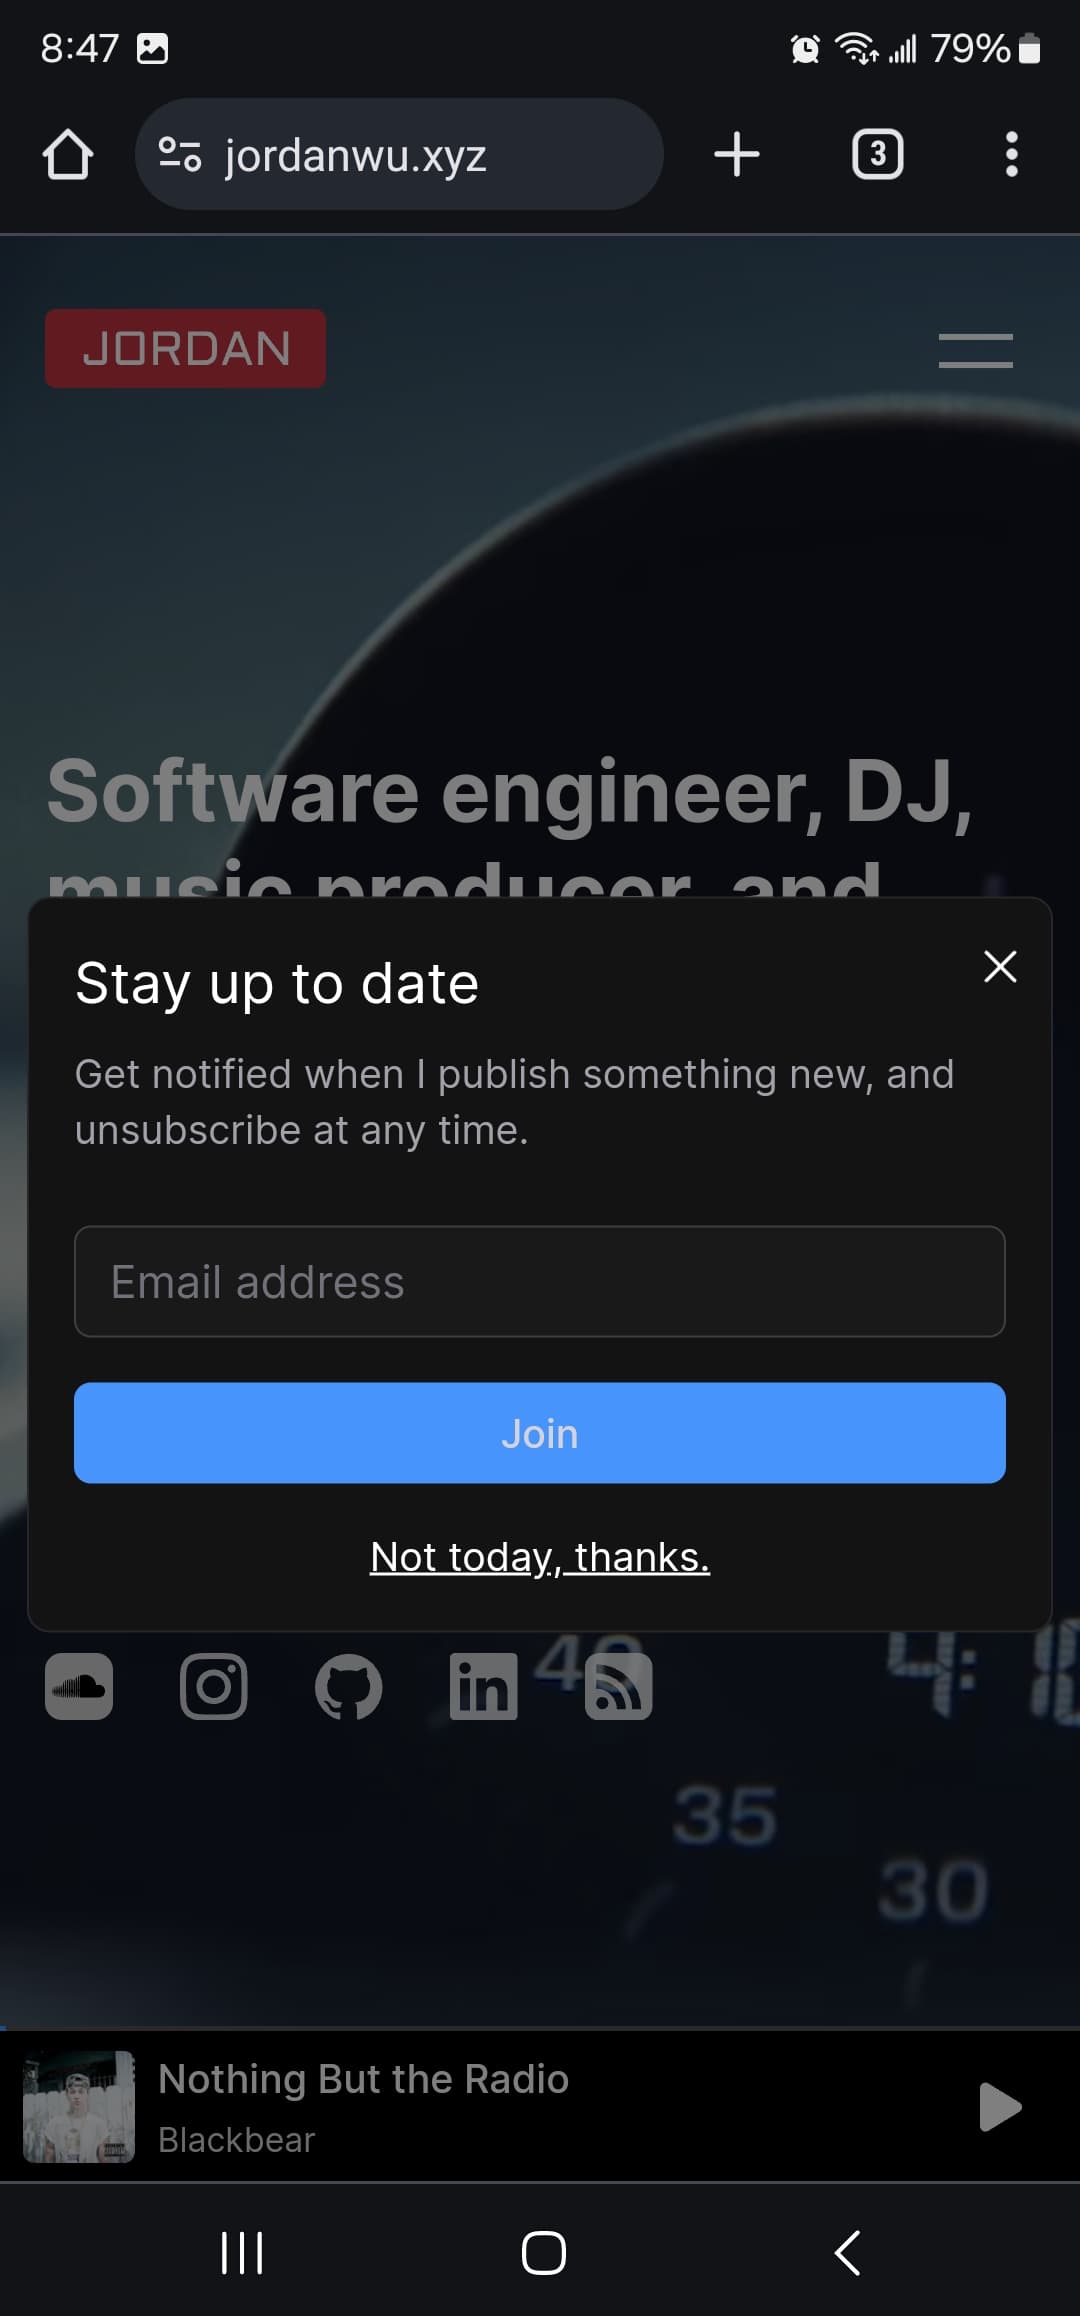
When creating the newsletter modal you would need to create the requirements for how it will behave on your website. It's usually based on user experience. Like how users will use the modal to design what it should look like. Before creating the modal you should think about how it will be displayed on both mobile and desktop screen sizes. What content would be in the modal? How would the user interact with the modal, for example would they be able to close the modal by clicking outside of it?
For this modal the requirements is it has to be responsive. Meaning it looks good on all screen sizes on any device. It would follow requirements of a modal which is a dialogue box over the main content of a website. It typically requires the user to interact with it before they can return to the main content. It should appear on any webpage on your website after some time. The user can only close the modal using the close button or by subscribing to the newsletter. Clicking outside the modal will not close it, this strictly makes the user read the content on the modal. Once closed the modal should not show in the future (you could make it show up more often like daily, weekly, or monthly).
Create Newsletter Modal
Create a Newsletter modal component called NewsLetterModal.
'use client'
import { useState, useRef, useEffect, memo } from 'react'
import { createPortal } from 'react-dom'
import Image from 'next/image'
import { useMutation } from '@apollo/client'
import { useAppDispatch } from '@/lib/hooks'
import { setSnackbarMessage, setSnackbarShow } from '@/lib/features/snackbar/snackbarSlice'
import SubscribeUserEmailMutation from '@/grapqhl/mutations/subscribeUserEmail'

const CLOSED_NEWS_LETTER_MODAL = 'CLOSED_NEWS_LETTER_MODAL'
const TEN_SECONDS_IN_MILLISECONDS = 10 * 1000

export const NewsLetterModal = memo(function NewsLetterModal() {
  const dispatch = useAppDispatch()
  const [show, setShow] = useState(false)
  const inputRef = useRef<HTMLInputElement | null>(null)

  useEffect(() => {
    const closeNewsLetterModal = localStorage.getItem(CLOSED_NEWS_LETTER_MODAL)

    let timeout: NodeJS.Timeout
    if (!closeNewsLetterModal) {
      timeout = setTimeout(() => {
        setShow(true)
        document.body.classList.add('overflow-hidden')
      }, TEN_SECONDS_IN_MILLISECONDS)
    }

    return () => {
      if (timeout) {
        clearTimeout(timeout)
      }
      document.body.classList.remove('overflow-hidden')
    }
  }, [])

  const handleClose = () => {
    setShow(false)
    localStorage.setItem(CLOSED_NEWS_LETTER_MODAL, 'true')
    document.body.classList.remove('overflow-hidden')
  }

  const [subscribeUserEmail] = useMutation(SubscribeUserEmailMutation, {
    onCompleted: (data) => {
      const { subscribeUserEmail } = data

      if (subscribeUserEmail?.message) {
        dispatch(setSnackbarMessage(subscribeUserEmail.message))
      } else {
        dispatch(setSnackbarMessage('You successfully subscribed!'))
      }

      if (inputRef.current) {
        inputRef.current.value = ''
      }

      dispatch(setSnackbarShow(true))
      handleClose()
    },
  })

  const handleFormSubmit = (event: React.FormEvent<HTMLFormElement>) => {
    event.preventDefault()

    const userEmail = inputRef.current?.value

    const options = {
      variables: {
        email: userEmail,
      },
    }
    subscribeUserEmail(options)
  }

  if (!show) return null

  const content = (
    <div
      className="opacity-1 fixed top-0 z-fab-offcanvas flex h-screen w-screen items-center justify-center bg-[#00000080]"
    >
      <div className="relative w-[95vw] -translate-y-2 rounded-lg border border-zinc-800 bg-[#131313] p-4 md:w-[60vw] md:max-w-xl md:-translate-y-10">
        <div className="absolute right-0 top-[6px] text-white">
          <button
            aria-label="Close News Letter Modal Button"
            className="p-2 backdrop-blur-lg transition"
            onClick={handleClose}
          >
            <figure>
              <picture>
                <Image
                  alt="Close modal button image"
                  height="20"
                  decoding="async"
                  src="/icons/close.svg"
                  width="20"
                  className="h-5 w-5"
                />
              </picture>
            </figure>
          </button>
        </div>
        <p className="text-xl md:text-2xl">Stay up to date</p>
        <p className="mt-2 text-sm text-zinc-400">
          Get notified when I publish something new, and unsubscribe at any time.
        </p>
        <form className="mt-6 flex w-full flex-col" onSubmit={handleFormSubmit}>
          <input
            ref={inputRef}
            aria-label="Modal Email Address"
            autoComplete="email"
            className="mr-2 inline-block h-[40px] w-full rounded-md border border-zinc-700 bg-zinc-700/[0.15] px-3 text-zinc-200 shadow-zinc-800/5 outline-none placeholder:text-zinc-500"
            name="email"
            placeholder="Email address"
            type="email"
            required
          />
          <button type="submit" className="btn mt-4 bg-[#4894fd] text-sm">
            Join
          </button>
        </form>
        <p className="mt-4 text-center text-sm underline" onClick={handleClose}>
          Not today, thanks.
        </p>
      </div>
    </div>
  )

  return createPortal(content, document.body)
})
-
This is a newsletter modal component that uses a GraphQL mutation query to save the user's email to the database.
-
It was refactored to use Redux for storing the snackbar state, check out How to Add Redux to Your Next.js App for more information. This allows components in your Next.js app access to a global snackbar component that can be reused anywhere in your app.
-
It uses localStorage to store a key called
CLOSED_NEWS_LETTER_MODALto remember that the modal has been closed and should not be shown again in the future until the user clear their browser cache. -
The modal will appear on the webpage after ten seconds.
-
To prevent users from scrolling when the modal is open,
document.body.classList.add('overflow-hidden')is called to disable the scrollbar and then removed when the modal is closed.
Once you have the newsletter modal created. The next step would be to add it to layout.tsx.
import StoreProvider from '@/providers/StoreProvider'
import ApolloProvider from '@/providers/ApolloProvider'
import NewsLetterModal from '@/components/news-letter-modal'
import AppSnackbar from '@/components/app-snackbar'

export default function RootLayout({
  children,
}: {
  children: React.ReactNode
}) {
  return (
    <html lang="en">
      <body>
        <ApolloProvider>
          <StoreProvider>
            {children}
            <NewsLetterModal />
            <AppSnackbar />
          </StoreProvider>
        </ApolloProvider>
      </body>
    </html>
  )
That's all you need to add a newsletter modal to your Next.js app! This modal can appear on any webpage in your app and only appears once per browser or until the user clears their browser cache.
Summary
A newsletter modal is a simple component that will help you and your audience stay more connected. Email marketing is the most cost effective way to market to your users that could drive more sales to your business. You see them everywhere and now you know why. In this blog post you added a newsletter modal to your Next.js app.
